Latest News

Thursday, March 14, 2013

Sony Xperia Z review

By on 9:31 PM


Sony Xperia Z: Design and build quality

The Sony Xperia Z is quite a square-looking smartphone, but is somewhat stylish with a clean and uninterrupted front and tempered glass rear cover. It's available in black, white and purple.

The Xperia Z doesn't feel oversized in the hand. It's very thin at and light, and is dust and waterproof. To this end the headphone port is hidden behind flaps.

Overall the Xperia Z has a distinctly premium and desirable nature. Build quality is excellent and the attention to detail exemplary.

Sony Xperia Z: Hardware and performance

The Xperia Z has powerful core specifications: a quad-core processor and 2GB of RAM yielded a good result in the Geekbench 2 test of 1986, only just short of the Nexus 4's record of 2009.

The Xperia Z also managed a very impressive 30fps in the GLBenchmark graphics test, too.

Like the Nexus 4, the Sony didn't do so well in the SunSpider JavaScript test with an average time of 1791ms, although we found surfing the web on the pre-installed Chrome browser smooth and responsive.

The 5in Reality display with its Full HD 1920 by 1080 resolution really makes the Xperia Z stand out. The screen is stunning and easily the best we've ever seen on a smartphone.

Content looks incredibly sharp thanks to its whopping 441ppi pixel density. Colours look particularly rich and vibrant. It really is like holding a TV in your hand.

The Xperia Z is a bit limited on the storage front, with only a 16GB model. There is a microSD card slot for adding more storage, though.

There's Wi-Fi, Bluetooth 4, NFC, aGPS and DLNA. Beyond the usual microUSB and headphone ports, there are two metal contacts on the left hand side of the handset for use with a docking station, and you get support for wireless charging and 4G.

Sony Xperia Z: Cameras

The Xperia Z has a 13 Megapixel rear facing camera with Sony's Exmor RS sensor. We're very impressed with the camera software and the resulting photos and video.

The Z is the first smartphone to enable HDR in video mode. There's also a decent 2 megapixel front-facing camera.

Sony Xperia Z: Software

The Xperia Z comes pre-loaded with Android 4.1.2 Jelly Bean and will be upgrade to version 4.2 shortly after launch according to Sony.

Sony Xperia Z: Battery life

In use the Xperia Z not only lasted a day but went a good way through a second. We went 31 hours and still had 20 percent of the battery remaining. We achieved this with moderate usage and the Stamina Mode switched on.

Sony Xperia Z: Verdict

The Xperia Z is the first smartphone which Sony has really nailed. We love the stylish, desirable and rugged design. The combination of excellent performance, a stunning screen and great cameras make the Xperia Z a force to be reckoned with.

Google launched Chromebook Pixel

By on 9:11 PM


Google has launched the Chromebook Pixel, its first Chrome OS laptop developed completely in-house, in an attempt to take on Apple's MacBook Pro Retina. Its 12.85in display has a 3:2 aspect ratio and massively high 2,560x1,700 resolution which Google hopes will persuade customers to part with a wallet-sapping £1049.

Built into a metal unibody chassis and weighing a fairly minuscule 1.5kg, the Chromebook Pixel is more than a little reminiscent of Apple's laptops - even down to the black Chiclet-style keyboard and all-in-one glass touchpad. It has a minimal selection of inputs, with an SD/MMC card reader on one side and a Mini DisplayPort, two USB ports and a power port on the other. There's no Ethernet port, so you'll have to use the integrated Wi-Fi to get online.

Unlike previous Chromebooks, which used either Intel Atom or ARM-based Samsung Exynos processors, the Pixel is powered by a Core i5 CPU running at 1.8GHz and paired with 4GB of RAM - this is a major performance boost for Chrome OS, which typically uses less power than a Windows-powered machine. There's also a 32GB SSD for storage, as Google expects Chromebook owners to live in the Cloud rather than store their files locally.

All that power, combined with the high-resolution screen, will significantly impact battery life - Google claims the Chromebook Pixel is good for five hours of continuous use, which is a far cry from the 9+ hours we've seen from previous models.

It's the screen that's the star of the show, with a 400nit brightness rating and a pixel density of 239ppi, which means you can't see individual pixels from a normal working distance. It's also touch-enabled, although we've never used Chrome OS on a touchscreen device so we don't know how much of a difference it will make in general use.

We think the Chromebook Pixel will be a tough sell for Google - not being able to run applications, except for those downloaded through the Chrome store, will be a major stumbling block for many. It's the same problem Microsoft has encountered with Windows RT, and when you can buy a MacBook Air for less we think the company may have a fight on its hands.

latest Samgung Series 9 13.3” Premium Ultrabook

By on 9:01 PM


Samsung recommends Windows 8. Advantages of the laptop.
  • Rethink Size, Super-slim at .50" thin
  • Rethink Brightness, SuperBright™ Plus 400 nit displays
  • Rethink Speed, Solid State Drive with fast boot up speeds
  • Rethink Power, Samsung’s PowerPlus charging technology


Specifications

Operating System  - Windows® 7 Professional (64-bit)

CPU/ Processor -  Intel® Core™ i5-3317U Processor

CPU Clock Speed (Max.) - 1.7 Ghz

CPU Cache - 3MB

Display - Screen size: 13.3" LED HD 1600 x 900

Ram - 4GB DDR3 (1600 MHz)

Hard Drive Capacity - 128GB

Graphics Chip - Intel® HD Graphics 4000 

Speakers - 3 W Stereo Speaker (1.5 W x 2)

Web Camera - 1.3 MP HD

Wireless LAN - Intel® Centrino® Advanced-N 6235, 2x2 802.11 a/b/g/n

Bluetooth HID - Bluetooth 4.0

USB Ports - 1 x USB 3.0 + 1 x USB 2.0

Keyboard - 80 keys

Weight - 2.55 lb

Wednesday, March 13, 2013

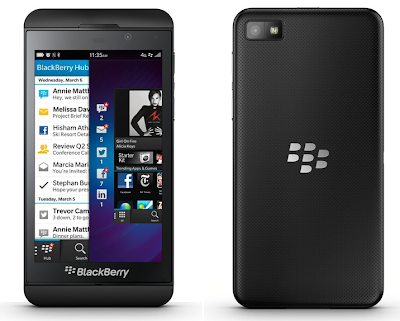
A Comparison review: Between Samsung Galaxy S3 vs BlackBerry Z10

By on 3:16 AM

It's been a long time coming but BlackBerry 10 has finally arrived and with it has come the BlackBerry Z10. It's the first full touchscreen BlackBerry which puts it directly up against the best smartphones on offer.
One of the most popular smartphones of 2012 was the Samsung Galaxy S3 so we've taken these two flagship devices and compared them section by section.
Take a look at the following two articles for more details on each handset.


Samsung Galaxy S3 vs BlackBerry Z10: Design and build

These two phones are quite different in the looks department. With a larger screen, it's not a surprise that the Galaxy S3 is the bigger handset overall at 71x137mm compares to 66x130mm of the BlackBerry Z10. However, at 8.6mm, the Samsung is thinner than the Z10 which we measured at 9.2mm.

The Galaxy S3 and BlackBerry Z10 are effectively the same weight at 133g and 135g respectively.

We don't like the fact that both these phones have flimsy plastic rear covers but the Galaxy S3 has an overall better build quality and much more premium feel to it.


Samsung Galaxy S3 vs BlackBerry Z10: Screen

As we mentioned, the Galaxy S3 has a larger screen than the Z10 at 4.8in. In today's standards the BlackBerry's 4.2in display is quite small.

Samsung and BlackBerry have opted for similar resolutions - 720x1280 and 768x1280 respectively.

The Z10 wins on pixel density here wit a whopping 355ppi against 306ppi. It's the highest pixel density of a smartphone we've reviewed to date (incoming Full HD phones will trump this).

Samsung Galaxy S3 vs BlackBerry Z10: Processor and performance

Despite being much older, the Samsung Galaxy S3 has a more powerful processor in the form of its Exynos 4 Quad, a quad-core chip clocked at 1.4GHz which is based on the ARM Cortex-A9 architecture.

The BlackBerry Z10 has a distinctly mid-range sounding 1.5GHz dual-core processor but the handset has twice as much RAM as the Samsung at 2GB so this evens things up a bit.

The core benchmark apps we use aren't available for the BlackBerry Z10 so we can't compare hard numbers. We found performance to be good on both handsets but the Galaxy S3 feels that bit speedier.

Samsung Galaxy S3 vs BlackBerry Z10: Storage

It's another win for Samsung when it comes to storage since the Galaxy S3 comes in a few different was storage options -16GB, 32GB and 64GB. BlackBerry has decided to only launch the Z10 in a 16GB model.

Both have the same potential for adding more storage with each smartphone providing a microSD card slot capable of accepting up to 64GB memory cards.

Samsung Galaxy S3 vs BlackBerry Z10: Cameras

Things are much tighter on the photograpy side of things. The Galaxy S3's 8Mp camera is a common resolution for a smartphone and the BlackBerry Z10 only matches it. Both records video in up to Full HD 1080p and have various and similar software features.

The front cameras are effectively the same, too, at 1.9Mp for the Galaxy S3 and 2Mp for the Z10. Each can shoot video at up to 720p.

Samsung Galaxy S3 vs BlackBerry Z10: Software

The Galaxy S3 is running with Android 4.1.2 Jelly Bean, (almost the latest edition of Google's operating system). Samsung uses its own TouchWiz user interface which comes with a number of exclusive features you won't find on other Android handsets. BlackBerry's Z10 is pre-loaded with the firm's brand new mobile operating system, BlackBerry 10.

We like BlackBerry 10 which has turned out to be a smooth and easy to use piece of software. However, it doesn't present any unique and outstanding new features. BlackBerry has created an OS similar to that of Android and iOS but laid out differently with features presented an an alternative way.

The other issue is that the Google Play Store is leagues ahead as an app store and a platform which developers prioritise over Blackberry 10.

Samsung Galaxy S3 vs BlackBerry Z10: Battery

The Galaxy S3's 7.8Wh (2100mAh) battery typically lasted us two days with a power saving mode helping keep the phone going as long as possible. We were disappointed to find the 6.7Wh (1800mAh) battery of the BlackBerry Z10 only lasted us a day, and only just at that.

iphone tips: How to unlock your Android phone with your face

By on 3:04 AM


The latest Android phones have another way to verify that you’re you: by scanning your face.

The idea behind Face Unlock (a feature that requires Android version 4.0 or better, by the way) is simple: the phone’s camera scans your face for a few seconds, then compares it to one or more previously saved head shots.

If it gets a match, then presto! You’ll arrive at your phone’s home page, no PIN required.

You can unlock your phone with a glance once Face Unlock scans your face.

It’s a nifty trick, but it’s not quite foolproof.

Before setting up the feature on your own Android phone, you’ll be warned that Face Unlock isn’t nearly as secure as using a numeric passcode.

Indeed, there’s always the possibility of a false match if someone who looks “similar” to you sneaks a peek at your handset.

In other words, think twice before protecting your phone with Face Unlock if you’ve stored military secrets on it, or if your online banking password is saved in your Android browser.

So, ready to use your face to unlock your Android phone?

How to do it-

  • Go to the Settings menu and tap Security, Screen Lock.*
  • Tap the Face Unlock option to see the litany of notes and caveats about the feature (including the assurance that your stored profile picture will be “kept private” on your handset). Ready to continue? Tap “Set it up.”
  • Next, you should see … well, yourself. Hold the phone until your face fits in the dotted outline; once the camera thinks it has a good shot of your face, it’ll snap a photo automatically. (For the best results, Google advises taking a Face Unlock photo indoors, where it’s not “too bright or too dim.”) Once you’ve made it to the “Face Captured” page, tap “Continue.”
  • You’ll also need a backup PIN or a security “pattern” to trace on the phone’s touchscreen, which you’ll be asked to set up once you’re done snapping photos of your face. The backup passcode will come in handy if Face Unlock can’t quite recognize you (which, as I’ve learned, happens on a fairly regular basis).
  • Now, time to test. Lock your phone, then press the “sleep/wake” button and hold the handset right in front of your face; the phone should unlock itself within seconds of “seeing” you.

*Note: These steps may vary depending on the make and model of your Android phone. I tested this tip on a Samsung Galaxy Nexus running on Android version 4.2.2.

How to make your Face Unlock a bit more secure? 

What to do is below-
  • Take multiple Face Unlock photos of yourself in different conditions—say, with your glasses on and off, or both outdoors and indoors—to give the phone a better chance of identifying you correctly. Just go back to the Settings menu, tap Security, then select “Improve face matching.”
  • Worried someone might try to unlock your phone with a still photo of you? You can set Face Unlock to unlock your phone only if it sees you blink. Just tap Settings, Security, then enable the “Liveness check” option.

How to revive a frozen iPhone: iPhone tips

By on 2:44 AM


Picture this: you’re happily swiping away on your iPhone when all of a sudden, it goes haywire—an app freezes up, the web browser spins and spins, or the screen simply stops responding to your fingertaps. Now what?

Well, you could try pressing the “home” key to return to the familiar home page, or you could press and hold the “sleep/wake” button (the thin button that sits on the top edge of the handset) to turn your iPhone off and on again.

Press and hold both the “sleep/wake” key (pictured here) and the home key to reset a frozen iPhone.

But what if the home and sleep keys aren’t responding, either?

Luckily, there’s another way to resuscitate a frozen, glitchy, or otherwise unresponsive iPhone: a so-called “hard” reset, which forces the iPhone to stop whatever it’s doing, shut down, and restart.

Think of it as waking your iPhone (or iPad, or iPod Touch) with a cold bucket of water rather than a gentle nudge—crude, but often effective.

Here’s how …

  • Press and hold both the “sleep/wake” button (at the top of the iPhone) and the home button (below the screen) at the same time.
  • After a few seconds, the screen will go blank; don’t worry, this is normal. Keep pressing and holding those buttons.
  • After a few more seconds, the Apple logo should appear. Go ahead and release the buttons.
  • Wait a bit longer, and your iPhone’s home screen should appear again. Phew!

Saturday, March 9, 2013

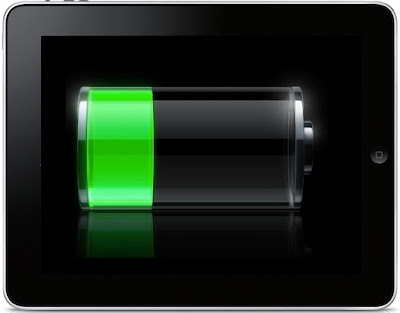
10 steps to increase iPad’s Battery Life

By on 10:14 PM

If you are looking to improve your iPad’s Battery life, then here are some tips to save and increase your iPad‘s Battery Life. I am not telling you to do all of it. But whichever ones you could do. More of it, more will be the battery life of your iPad.
10 steps to increase iPad’s Battery Life

Don’t expose iPad to high or low temperature
If the iPad is exposed to high or low temperatures, its battery could be harmed and it causes decrease in battery life. So you should be careful about that. It should be OK between 32 degrees F and 95 degree F.
Update the Firmware
Whenever there is a new update of your iPad’s firmware is available, you should update it. Apple might be bringing new features in the firmware which could increase your iPad’s battery life.
Turn off Wi-Fi and 3G
You could turn off iPad’s Wi-Fi feature if you aren’t using it to increase your iPad battery life. Go to Settings, select Wi-Fi and turn it off.
In areas with limited 3G connectivity, if you try to use 3G, it could cause more loss of theiPad’s battery life. For doing it, go to ” Settings ” and turn the ” Cellular ” option off.
Customize Brightness
You could increase your iPad’s battery life greatly by lowering the brightness. If you think you have enough brightness for the display, you lower it. Go to Settings -> Brightness & Wallpaper and lower it by dragging the slider to the left.
Enable Airplane Mode
In some areas, the Wi-Fi or 3G network of your iPad will be facing some problems. So theiPad automatically tries to be in contact with it and thus consumes more power from thebattery. In these circumstances, enabling the Airplane Mode could help you increase your iPad’s battery life. Go to Settings and turn Airplane Mode on.
Disable Push Notifications
The Push Notifications are used to make you aware mainly of of your iPad updates. But turning it off could save and improve some battery life. So to disable it, go to ” Settings ” and turn the ” Push Notifications ” feature off.
Disable Location Services
I am not telling you to always keep the location services off, but just when you are not in need of it or when your iPad’s battery is low. To disable it, go to Settings -> General and turn the Location Services off.
Turn off Push Mail
If you are receiving emails frequently, it could affect your iPad’s battery life. So turning off Push Mail will do it. Go to Settings -> Mail, Contacts, Calendars -> Fetch New Data and turn Push off.
Turn off Equalizer
The Equalizer feature in your iPad automatically adjusts the sound. But this could decrease your iPad’s battery life. So you could turn it off to increase battery life.
Turn on Auto Lock
Turn on the Auto Lock feature so that whenever the iPad is inactive, it automatically turns off after a certain time interval.

  • How to Turn on Auto Lock

If you aren’t using your iPad for sometime, then you could apply the auto lock feature to automatically turn off your iPad. By doing this, you could save and increase your iPad’sbattery life. It is very simple. Just do the following to set the Auto Lock feature in your iPad.
1. Go to ” Settings “.
2. Select ” General “.
3. Tap the Auto Lock option and set the interval and apply it.
That’s all! Now the auto lock feature will be active in your iPad